
Proper Septic Tank Pump Installation
In order to ensure the optimal performance and longevity of a septic system, proper installation of the pump and discharge assembly is critical. This should include three key elements: accessibility for maintenance, the ability to quickly swap out parts if necessary, and proper control to allow for safe operation.
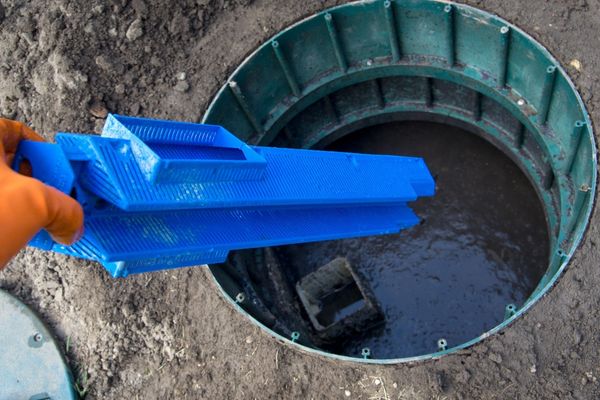
Accessibility
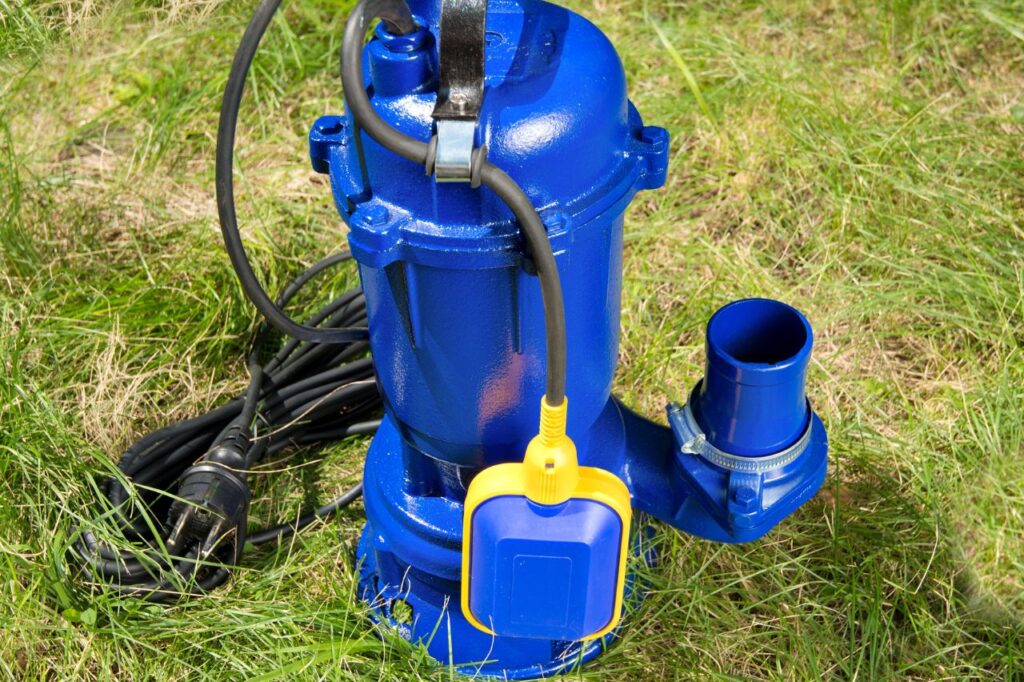
Accessibility is key when installing a pump, so that service or replacement can be done without having to enter the tank. To ensure it is accessible, a manhole should always be placed at the surface level with the pump directly below it. Additionally, a quick disconnect assembly should be part of the pump, enabling users to easily and quickly remove and reinstall it without significant tools.
To make things even easier, consider adding a rope too for lifting purposes- this way removal and/or installation of the pump can be done from above ground level.
Replaceability
Replaceability is important for pumps and controls. They need to be easily accessible from the surface and capable of being taken out from the tank without significant excavation.
Wiring should go through conduit underground and adhere to all applicable electrical standards. The presence of a separate float tree will allow quicker access and removal, when necessary, with the pump elevated 3-4 inches off the bottom of the tank for protection from solids accumulation. It’s important to provide enough blocks for stability when replacing the pump so it doesn’t topple over when lifted out.
Controllability
To ensure proper operation and maintenance of a pumping system, the sensors and controls used should be accessible, adjustable, and removable. Float switches are the most commonly used sensors for activating pumps and alarms, but other devices such as pressure transducers or ultrasonic water level sensors can also be employed.
A motor duty switch into which the pump is plugged is the simplest form of dosing. However, if meters or counters are not included in this configuration, it will not provide any information about system performance.
To better monitor the system’s performance, it is recommended to install a control panel that allows for data collection. Additionally, a high-water alarm float switch should be included in order to signal abnormal hydraulic loading and potential pump failure. When these requirements are met, it will make it much easier to properly maintain a pumping system.
Basic Septic Tank Pump Troubleshooting
Pump Won’t Turn On
Having trouble getting your septic tank pump to start up? Check the three main areas that might be causing the problem: the electrical system, the actual pump, and its controls. Take care when dealing with electricity – turn off power supply breakers before you do any testing. If you don’t feel comfortable troubleshooting it yourself, call in a professional for assistance.
Electrical Issues
Electrical problems can arise in a septic system’s pump and should be immediately addressed. Electrical troubleshooting should be done using a multimeter or similar device to test the wires in the system for any damage that needs to be replaced.
The following is a list of potential electrical issues and their solutions: 1) Fuse is blown or circuit breaker is tripped; 2) Power cord not properly wired and making poor contact; 3) Branch circuit wiring too small to carry pump load, 4) Motor overload tripped, 5) Voltage provided is too low, 6) Control panel connection or watertightness issues, and 7) Bad splice connections or damaged conduit.
If these issues are present, call an electrician to repair the circuit or make necessary changes; please note the size recommended by the pump manufacturer and nameplate rating of all installations.
Pump Issues
Pump problems can occur due to a variety of causes such as blocked or bound impeller, frozen bearings, insufficient water level to actuate the control switch, and internal motor defect. To diagnose the issue, first check that the pump is not obstructed and can operate properly.
Then disconnect power, remove the pump from the sump, and observe for freedom in impeller and shaft rotation. If it is blocked or bound, clean the volute and impeller while if bearings are frozen, free and lubricate lower bearing of column pump.
Additionally, ensure that water level is high enough to actuate control switch or readjust control floats or weights. If there’s an internal motor defect, contact an authorized service center for repair or replacement.
Float/Control Issues
Having issues with float/control operations on your sewage pumping system? It could be due to a float becoming stuck or damaged, an obstructed float rod, or a defective float switch.
Firstly, you will need to add water and observe the sump turning on. If the pump is attached directly to the pump line, consider installing a separate float tree. Otherwise, adjustments can be made to the control floats or weights. To determine if it’s the switch that has gone bad, you will need to disconnect power from the pump and connect it to a rated voltage.
Carefully inspect for any deformation, burned components as well as black discoloration. Additionally, you can unplug its cord from the piggyback plug of the float switch and insert directly into an outlet to test its functionality. Ultimately, you may need to replace key elements such as pressure switches for proper functioning of the system.
Pump Turns on But No Water Flow
Begin by checking the pump itself as well as the tank or piping. Exercise extreme caution when dealing with electricity and be sure to cut off power supply breakers before examining or testing any electrical components. If you aren’t comfortable carrying out the troubleshooting process properly, it’s best to call a professional for assistance.
Pump Issues
Possible pump problems include clogged or damaged impellers and clogged screens or pump inlets, which can cause motor running backward continually. Another problem may be that the tank bottom has sludge, which can affect the suction power of the pump. Additionally, incorrectly sized pumps and an inappropriate electrical supply could be factors to consider.
To address these issues, it is important to inspect the various components for cleaning needs and ensure correct sizing according to required total dynamic head. Also, ensure that the phase of power matches what is listed on the label/wiring diagram for smooth functioning.
Tank or Piping Issues
Potential tank or piping problems that could lead to water overflow include a defective, inoperative check valve; an inadequate discharge pipe diameter; and a high static and friction head.
To identify the source of such a problem, it’s important to inspect the tank for leaks, look for leaking fixtures in the home or facility, confirm that clean-water sources are not connected, and ensure that the soil treatment area is taking water.
Additionally, you should check for obstructions or ice in the pipe discharge before measuring and comparing the diameter of the discharge pipe to manufacturer suggested specifications. In some instances, such as high static/friction head cases, you may need to have higher-head pumps installed and larger-diameter pipes installed.
Pump Won’t Stop Running
If your pump won’t stop running, there are a few potential causes you should investigate.
One possible reason is that the soil treatment area may be saturated and not taking in effluent; in which case, it’s important to pump the tank and allow the area to dry out.
Alternatively, the float or weight may not be working properly, and could require cleaning, adding water to the tank, and readjusting the control floats or weights.
Other issues that could be causing your problem include a clogged screen or pump inlet; an obstruction or frozen pipe discharge; inadequate discharge pipe diameter; a defective or inoperative check valve; a check valve installed in the wrong direction; and/or too high of a static and friction head.
Pump Cycling Too Frequently
Frequent pump cycling can be caused by a number of things, such as a saturated soil treatment area, excessive water inflow or a defective check valve. It could also be due to the lack of a check valve in high head installations, floats or weights being improperly adjusted or the pump being too large for the tank.
To resolve these issues, it is important to examine and observe the backflow of water from the discharge and clean the gate of the check valve if necessary.
Also, surface or groundwater should be checked to see if it is entering the system and larger pump or tank may need to be installed. Additionally, control floats or weights should be readjusted, and measurements should be taken to ensure that the tank size meets design/code recommendations.
Pump Starts Then Stops
If your pump turns on and then stops, the most likely cause could be a motor overload tripped. Allow the motor to cool for 5-10 minutes and reconnect—if the overload trips again, take corrective action such as having an electrician check the circuit voltage or replacing faulty parts such as a thermal overload.
It could also be caused by exceptionally high or low line voltage, an impeller rubbing against a pump housing, worn out bearings in the pump or motor, an excessively high-water temperature, or floats/weights not properly adjusted. Taking these into account can help you diagnose and address any issues with your pump.
Pump Making Loud Noise
Loud noises coming from your pump can indicate that something is wrong. Possible issues include a loose impeller, an impeller rubbing against the inlet plate or pump housing, worn out or defective bearings, a loose shaft coupling, obstructions on the rotating parts, if the pump isn’t securely positioned on the bottom of the dosing tank and if there is gravel or stones at the bottom of the tank.
To correct these issues, it may be necessary to disconnect power, remove the pump from the dosing tank and observe for freedom of impeller and shaft rotation, tighten fasteners, repair, or replace pump or bearings, adjust the discharge piping and pump, clean tank(s) and make sure lids are tight.