Snyder Industries
Snyder Industries has been a leader in the development of tank solutions for water and waste storage applications for over 50 years. Their tanks are designed with advanced leak proof properties and increased structural integrity so that they optimize both performance and longevity. Consequently, their underground and above ground tanks are becoming increasingly popular choices for installers, contractors, and homeowners across the nation.
Waste Applications
For residential and commercial sewage disposal, Snyder Industries provides a range of septic and pump tanks. Crafted from polyethylene, they are designed to be resistant to corrosion while being lightweight enough for easy storage and transportation. Depending on the model chosen, they could be installed with 6-36 inches of soil cover making installation simpler than traditional materials like concrete or steel. Additionally, the NexGen D2 design requires no water for backfill so that setup time is reduced significantly. Snyder works in conjunction with retail establishments to provide these products to contractors who specialize in the onsite waste application market.
NEXGEN D2 Septic Tanks
NEXGEN D2 Septic Tanks are renowned for their exceptional strength and convenience. Constructed from a single piece of molded plastic, the tanks have superior design durability with no seams to leak. Installation is made easy with no special backfill or water filling required, and pumps can be used for dry pump-outs. These tanks are suitable for a variety of uses and come in four capacity sizes: 750, 1000, 1250, and 1500 gallons. In addition, PVC tees and gaskets are included as well as access openings and lids that accept NexGenD2 manhole extension, double wall corrugated pipe, and ribbed PVC pipe. What’s more? NEXGEN D2 Septic Tanks require no heavy equipment to move into place – making them an economic choice for septic tankers!
Required Permits
To build or own a septic system most states require an application for permits and a site evaluation. This evaluation will determine factors such as the proper type and size of the system, where it should be located in relation to setbacks, slope, and grade of the land, loading rate based on the soil absorption rate and any other special conditions that may cause issues. In order to keep people and environment safe it is important to go through all these steps in obtaining a permit and having the correct fee amounts from state to state and county to county. For specific information regarding applications, fees, and permits please contact your local on-site agent.
Site Selection
When looking for a suitable site for a Snyder polyethylene tank, make sure to check the local and state regulations, including obtaining the necessary permits and making sure all setback requirements are met. The tanks have several advantages over concrete that also make them easier to install – they can usually be handled by 2-3 people and transported in the back of a pickup truck rather than needing an expensive boom lift.
A crucial step in ensuring a successful onsite system installation is the site selection process. This involves assessing the proposed site for its current environmental conditions, geology, prior land use and such factors as slope, wetlands, potential flooding areas, landscape, and vegetation roots.
All components of runoff and water shed need to be examined to ensure that the septic system will not have ground water infiltration issues. Furthermore, all potential sources of water accumulation or diversion must be avoided when making the selection. Landscape features like swales or depressions should be avoided in order to guarantee that the warranty will remain valid.
When selecting a tank or system location, the landscape position should be considered first. This is largely due to the underlying bedrock which impacts the topography of terrain. Consequently, ridges with limited soil depth tend to have good water drainage both above and below the surface and are ideal areas for siting tanks or systems. On the other hand, shoulder slopes and back slopes often have good subsurface drainage but may contain exposed outcrops of bedrock due to erosion activity.
Furthermore, steep side slopes are another area with powerful erosion forces at play, so these should be avoided when possible. Ultimately, sites with deep soils as well as poor subsurface drainage such as toe slopes and bottomlands should also be avoided in order to maintain warranty coverage on tanks and systems.
Site selection is an important step in septic tank installation since high ground must be chosen to ensure that groundwater will not enter the tank. The tank should be located approximately 20-25 feet away from any buildings and 50-100 feet away from drinking wells, along with a curtain drain or berm if the site is clay soil or on a slope.
Additionally, Snyder Tanks are not suitable in areas with extremely high groundwater tables or excessive runoff, or where the tank would be at the lowest point on the site. The elevations of each system component must also be taken into account to ensure that there is enough drop in the system for waste/effluent to move between components. Lastly, a drop of 2-3 inches should be maintained between each pipe’s inlet and outlet for optimal performance.
Inspection Requirements
It is crucial to abide by inspection requirements when installing a septic tank. In order to do so, protective measures may need to be taken before the area is inspected in order to reduce the chances of damaging the installation due to excessive rainfall or water infiltration. This can be achieved by covering the disturbed area with a tarp, setting up silt fencing around it, and mounding dirt to prevent water from saturating the soil near the installation.
After inspection is complete, it is essential that the tank undergoes an effective backfill process consisting of 12-inch layers that are compacted individually. The tank should also be mounded as specified in installation guidelines for proper drainage away from both its top and excavation sites.
Installation Instructions
Installing a septic system correctly is essential for proper and safe wastewater management. Be sure to contact your local or state sanitarian for approved installation procedures before beginning any work. In addition, referred to our website for information about site selection and preparation and how to address any water runoff from sloping terrain or adjacent structures or paved surfaces. If the tank is not located properly in an area of water runoff or the installation is not managed correctly, it could result in the voiding of the warranty.
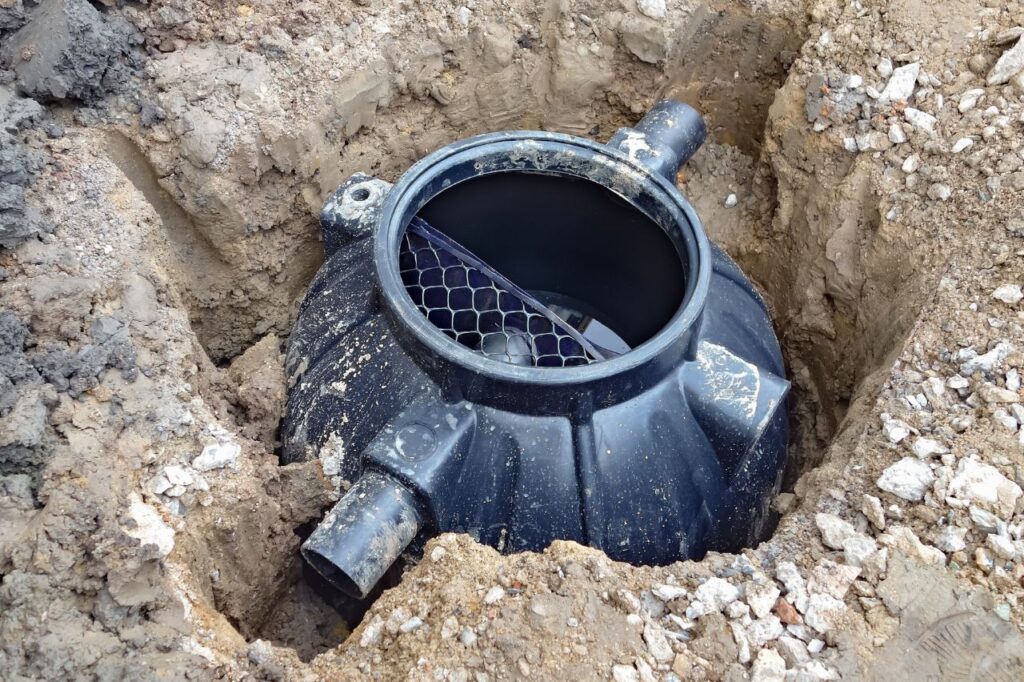
Excavation
Excavation is the process of digging or removing soil in order to install a septic tank. Careful attention should be made to the depth of excavation, as it should provide at least 6 inches but no more than 36 inches of cover over the top of the tank. An 18–24-inch space should also be allowed on both sides and on both ends of the tank for installation purposes. The bedding material (preferably sand) must also be well-packed and leveled, with a tolerance level +/- 1/2 from each end. In cases where using native soil is necessary, ensure it meets the requirements to provide uniform support and isn’t rock filled.
Backfill Materials
When choosing backfill materials, native soil can be an option, assuming it is free of any wood, masonry debris, or silt. Shrink/swell clay soils should not be used due to their lack of stability. If native soil is unsuitable, a free-flowing and compactable material like sand or gravel that is larger than 1/4″ but smaller than 1 1/2″ should be used. Care must be taken to ensure that sharp objects do not come in contact with the tank.
Backfill Exterior
When backfilling around an exterior tank, it is important to be sure the soil is compacted. This should be done by adding 12” layers at a time and firmly compacting each layer. Pay extra attention when compacting around the interior support columns, as these need to be filled with free-flowing fill and compacted in 6” layers for structural support. Also make sure to compact the soil beneath both the inlet and outlet piping. The maximum amount of backfill over the top of the tank should not exceed 36”, but a mound can be placed over it to redirect surface water away from the tank.
Septic Tank Connections and Fittings
Installing a septic tank requires making proper connections to ensure correct operation. Low Profile septic tanks require 4” PVC sanitary tees and rubber gaskets for the inlet and outlet pipes. All pipes should be chamfered, and gaskets must be lubricated before installation. The gasket should be installed from outside of the tank by pushing the pipe into the gasket. The inlet and outlet piping should then be solvent welded to these sanitary tees, taking note of the direction of flow as it is typically lower than that of inlet. Additionally, all tanks are labelled correctly according to this requirement.
Tank Riser Installation
To finish up your manhole installation, you’ll need to add manhole extensions and lid risers. Manhole extensions are supplied with gasket seals and self-tapping screws that secure the extension in place. All screws should be fastened evenly around the circumference of the base of the tank. Pay attention not to over-tighten the screws to ensure that they remain seated securely in their placement.
Cistern/Pump Tank Installation
To install a cistern/pump tank properly, begin by affixing bulkhead fittings to the flat areas on either end of the tank. Every tank must be vented, including any tanks that are connected in a series. The vent pipe should be equal in diameter to the outlet pipe. Additionally, when multiple tanks are installed in series at least 36 inches must be left between each tank for clearance. Lastly, flexible connections are necessary between each tank when installing multiple tanks in a connected arrangement.

Caution
- It is important to use caution when handling and storing low profile septic tanks and cisterns.
- Be sure to keep the tank away from open flame or sources of intense heat.
- Do not install the tank under a path that vehicles or heavy equipment could pass through.
- Low Profile septic tanks and cisterns should not be left empty for extended periods of time, as they are not designed to be used in this manner.
- These tanks should only be used underground; they are made of resins that meet FDA specifications for the storage of drinking water and can therefore be used for that purpose.
- Sharp objects should also be kept away from the tank to avoid punctures, while counter buoyancy measurements may be required in some instances.
- For applications other than typical household sewage, the use of this plastic underground tank is not recommended as it will void the product’s warranty.
- Additionally, the maximum temperature allowed for liquid entering the tank is 120° F, with a maximum bulkhead fitting size of 4”.